During my last two trips to Lembeh, Indonesia, I had an interesting time shooting the Laowa 25mm Ultra Macro lens. If you haven’t heard of this lens, you can read about it from my review here.
On the first trip with the Laowa, I used it in a port built for the Canon 100L macro lens. While this worked, the port was much wider in diameter than the lens itself. When shooting tiny critters at magnification levels that high, subject acquisition becomes more difficult the wider the port. WIth the Laowa ultra macro lens being much thinner than regular lenses, I was hoping during my first attempt at using the lens that someone would make a dedicated port for it. Enter my buddy Sam Chae!
My dive buddy Sam is an avid underwater photographer and a keen tinkerer. He once modified his Nexus underwater housing to fit various models of Nikon cameras as new generations became available! This involved machining the inside of older housings to fit new cameras! Sam works in the aerospace (helicopter) industry and has access to machinery and tooling needed to do this. When he suggested that he could make a custom port for this lens, I jumped at the opportunity!
Drawings and initial design
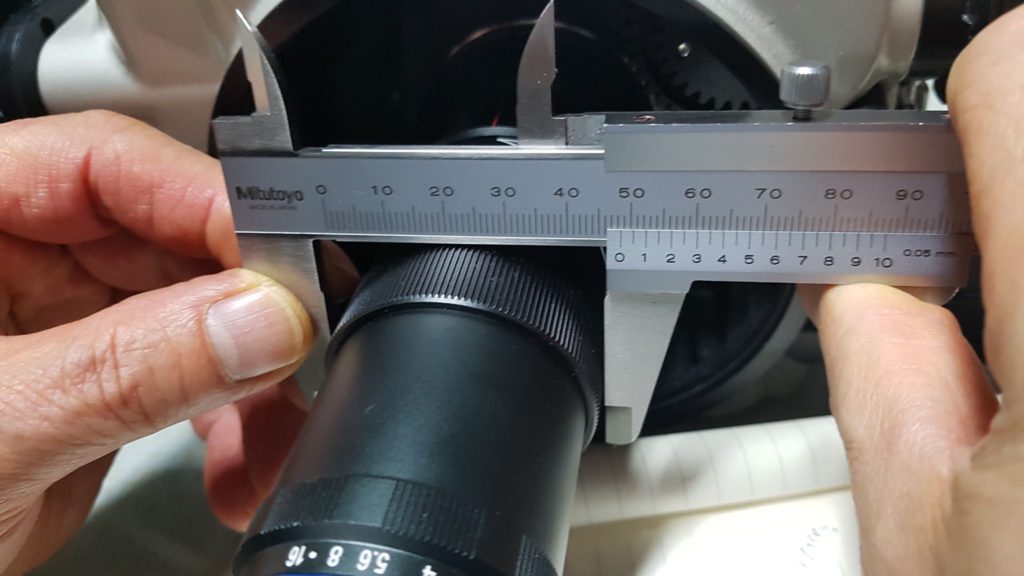
While I was still in Lembeh using the lens underwater for the first time, I sent Sam some basic measurements and informed him that the lens ALMOST fit the Canon 100L port. These measurements and manufacturer specifications were then passed on to the workshop where drawings were made and a basic design was created. Sam later ordered another ultra macro lens and brought it to the workshop for more precise measurements.

Milled from a solid block of Aluminum
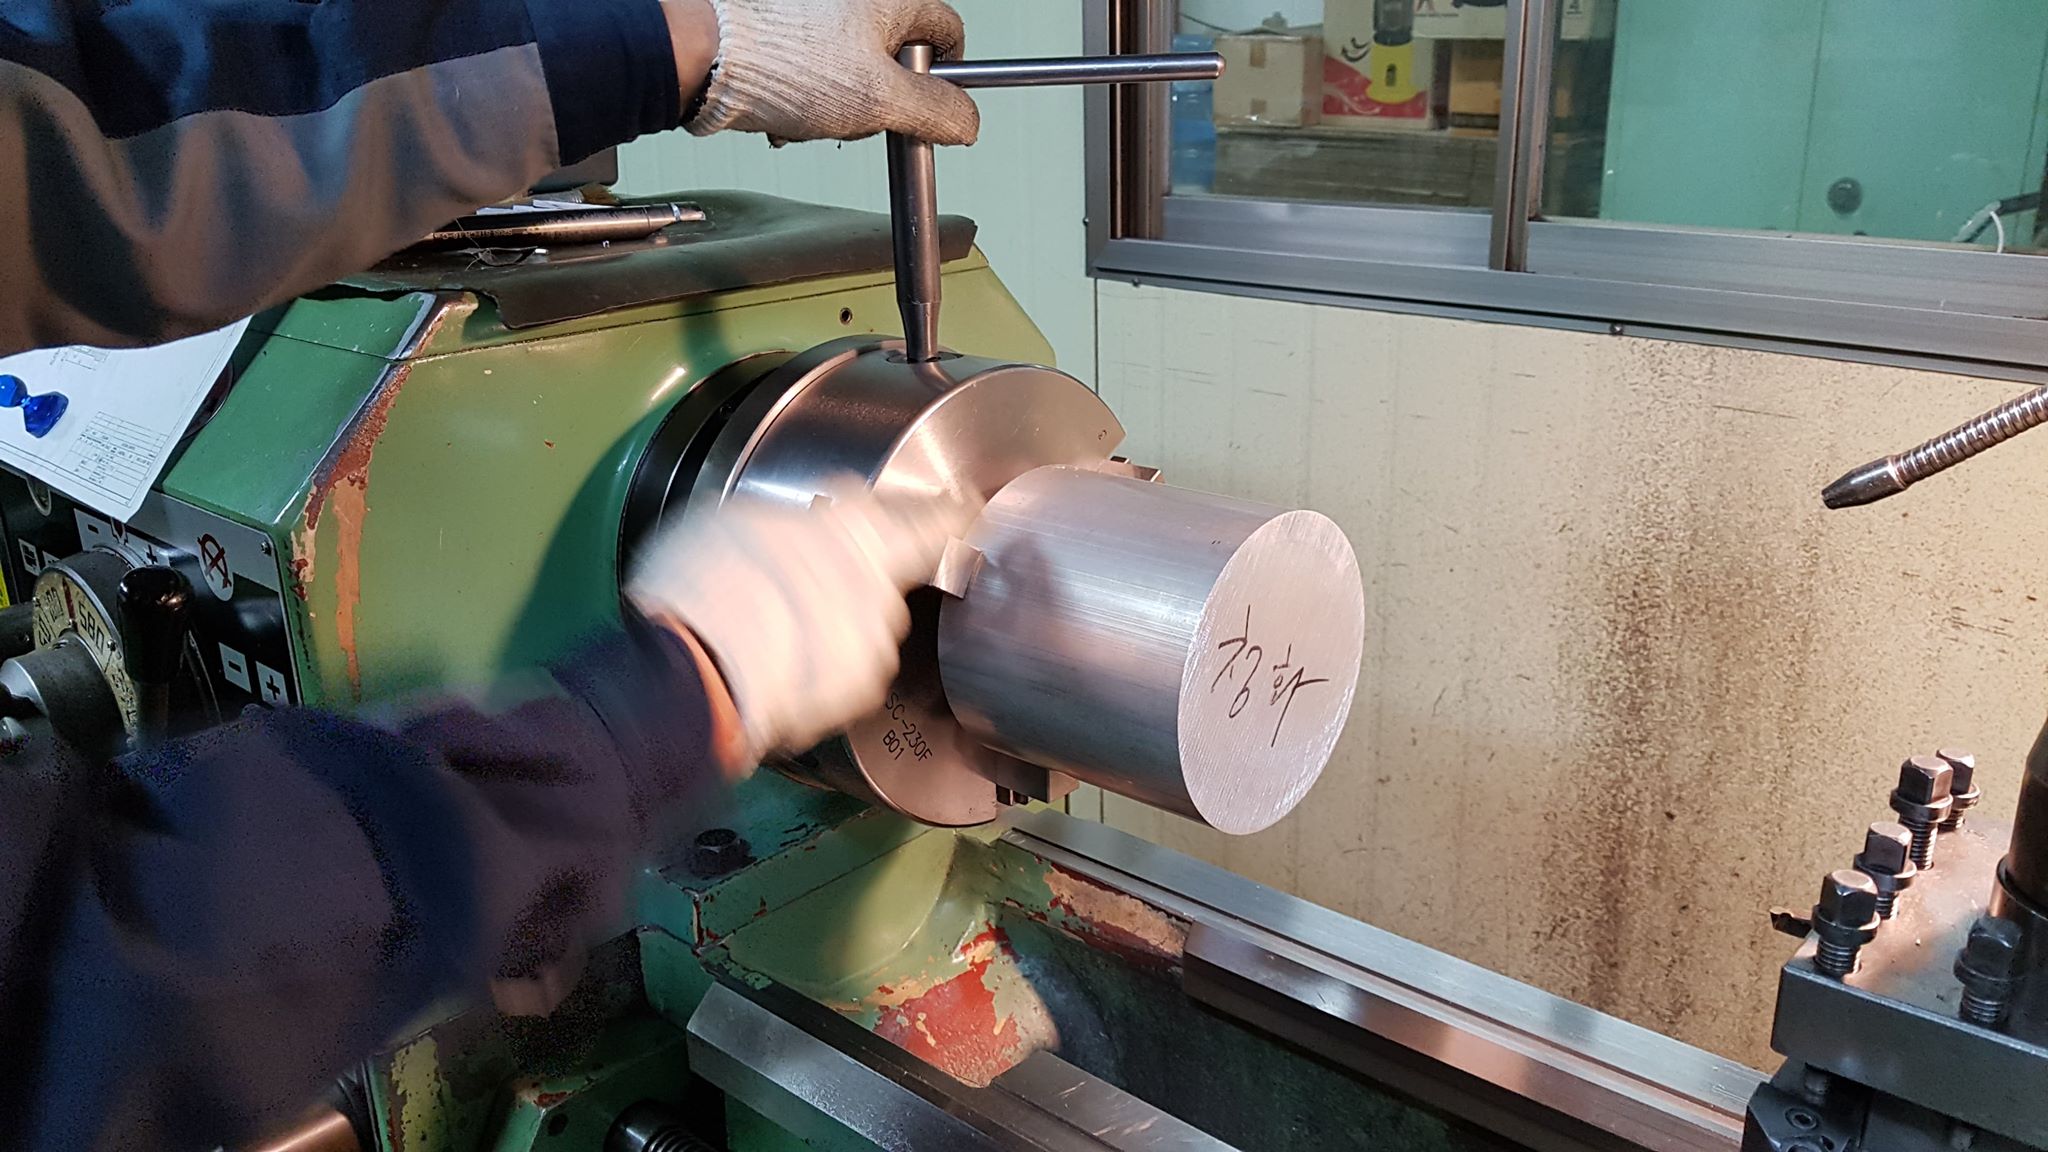
After measurements and drawings were completed, the milling work began. The port was cut from a billet of aluminum on a lathe. The initial rough trim took over 2 hours to achieve a basic shape. The precision cutting process then took almost another hour. This involved stopping the lathe to take measurements and cutting again as needed. The port was made with traditional metalwork techniques instead of using automatic 3D CNC machinery!
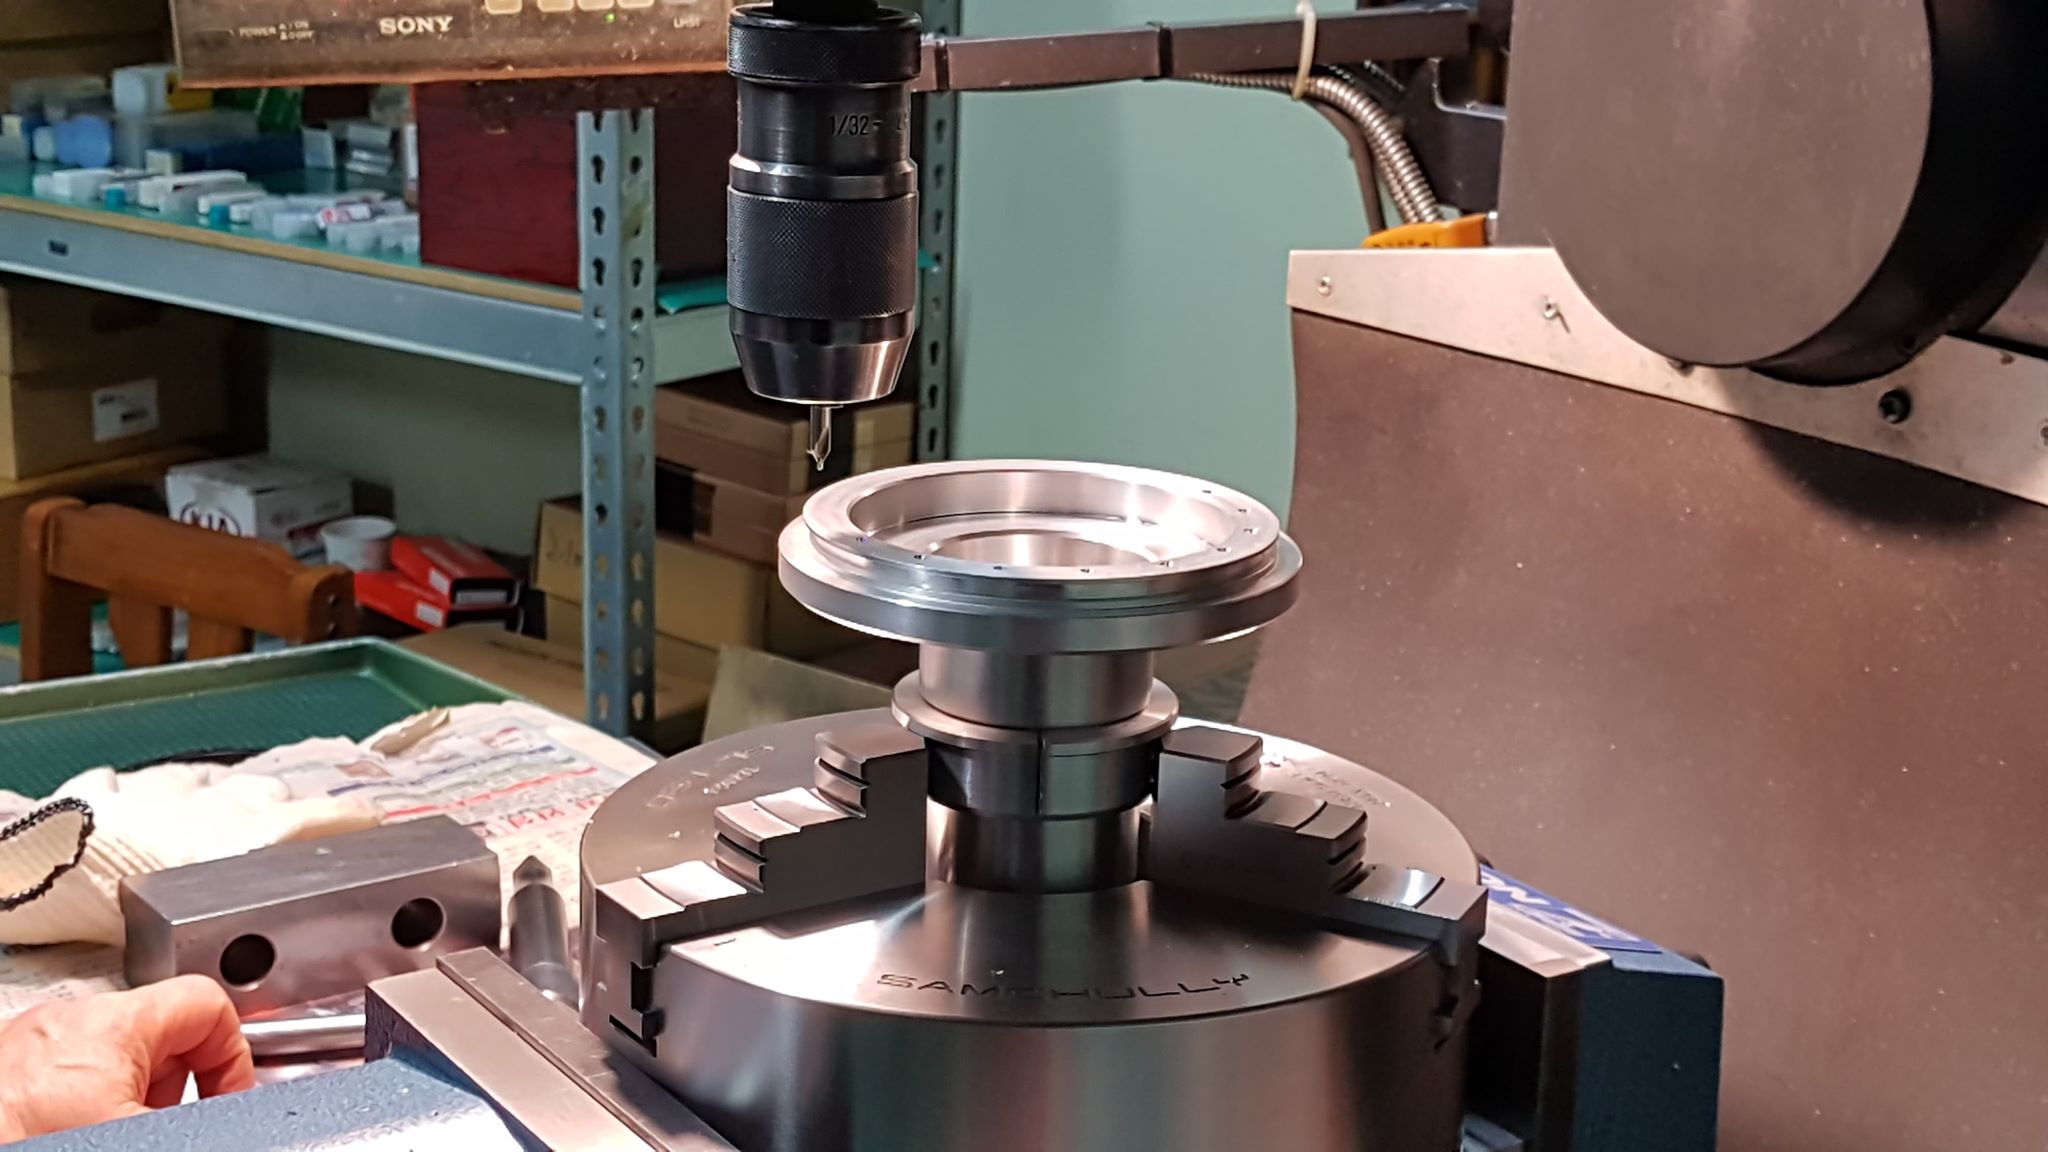
After the cutting was completed, the holes had to be drilled to attach the port connectors to fit Nauticam housings. This was done via precision drill equipment for a perfect match.
The front element is acrylic instead of glass. This was done because of time considerations. I needed the port in time for an assignment and an acrylic front element was easier and quicker to order.
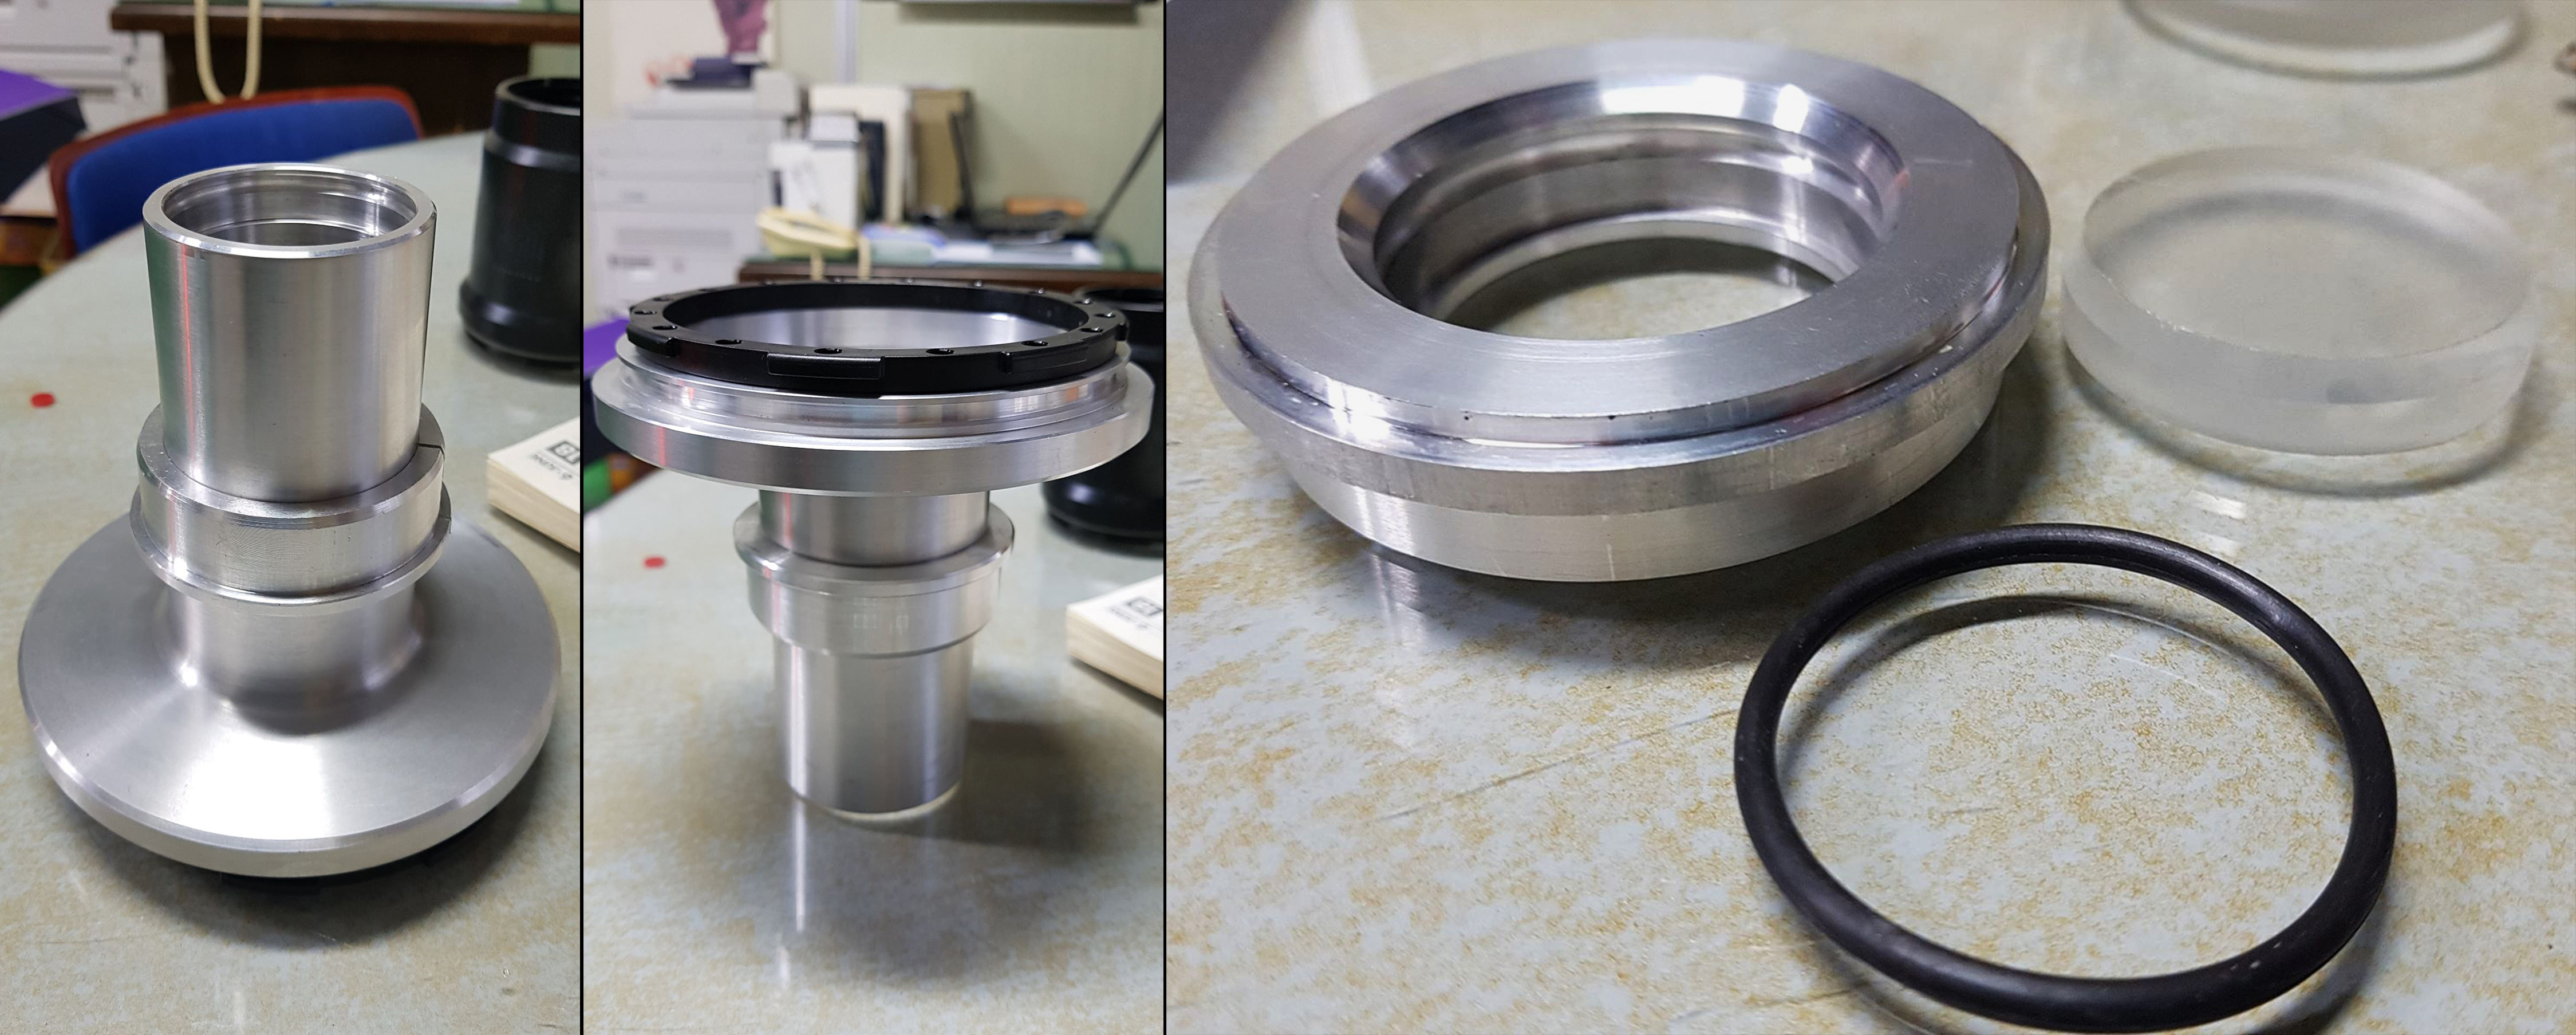
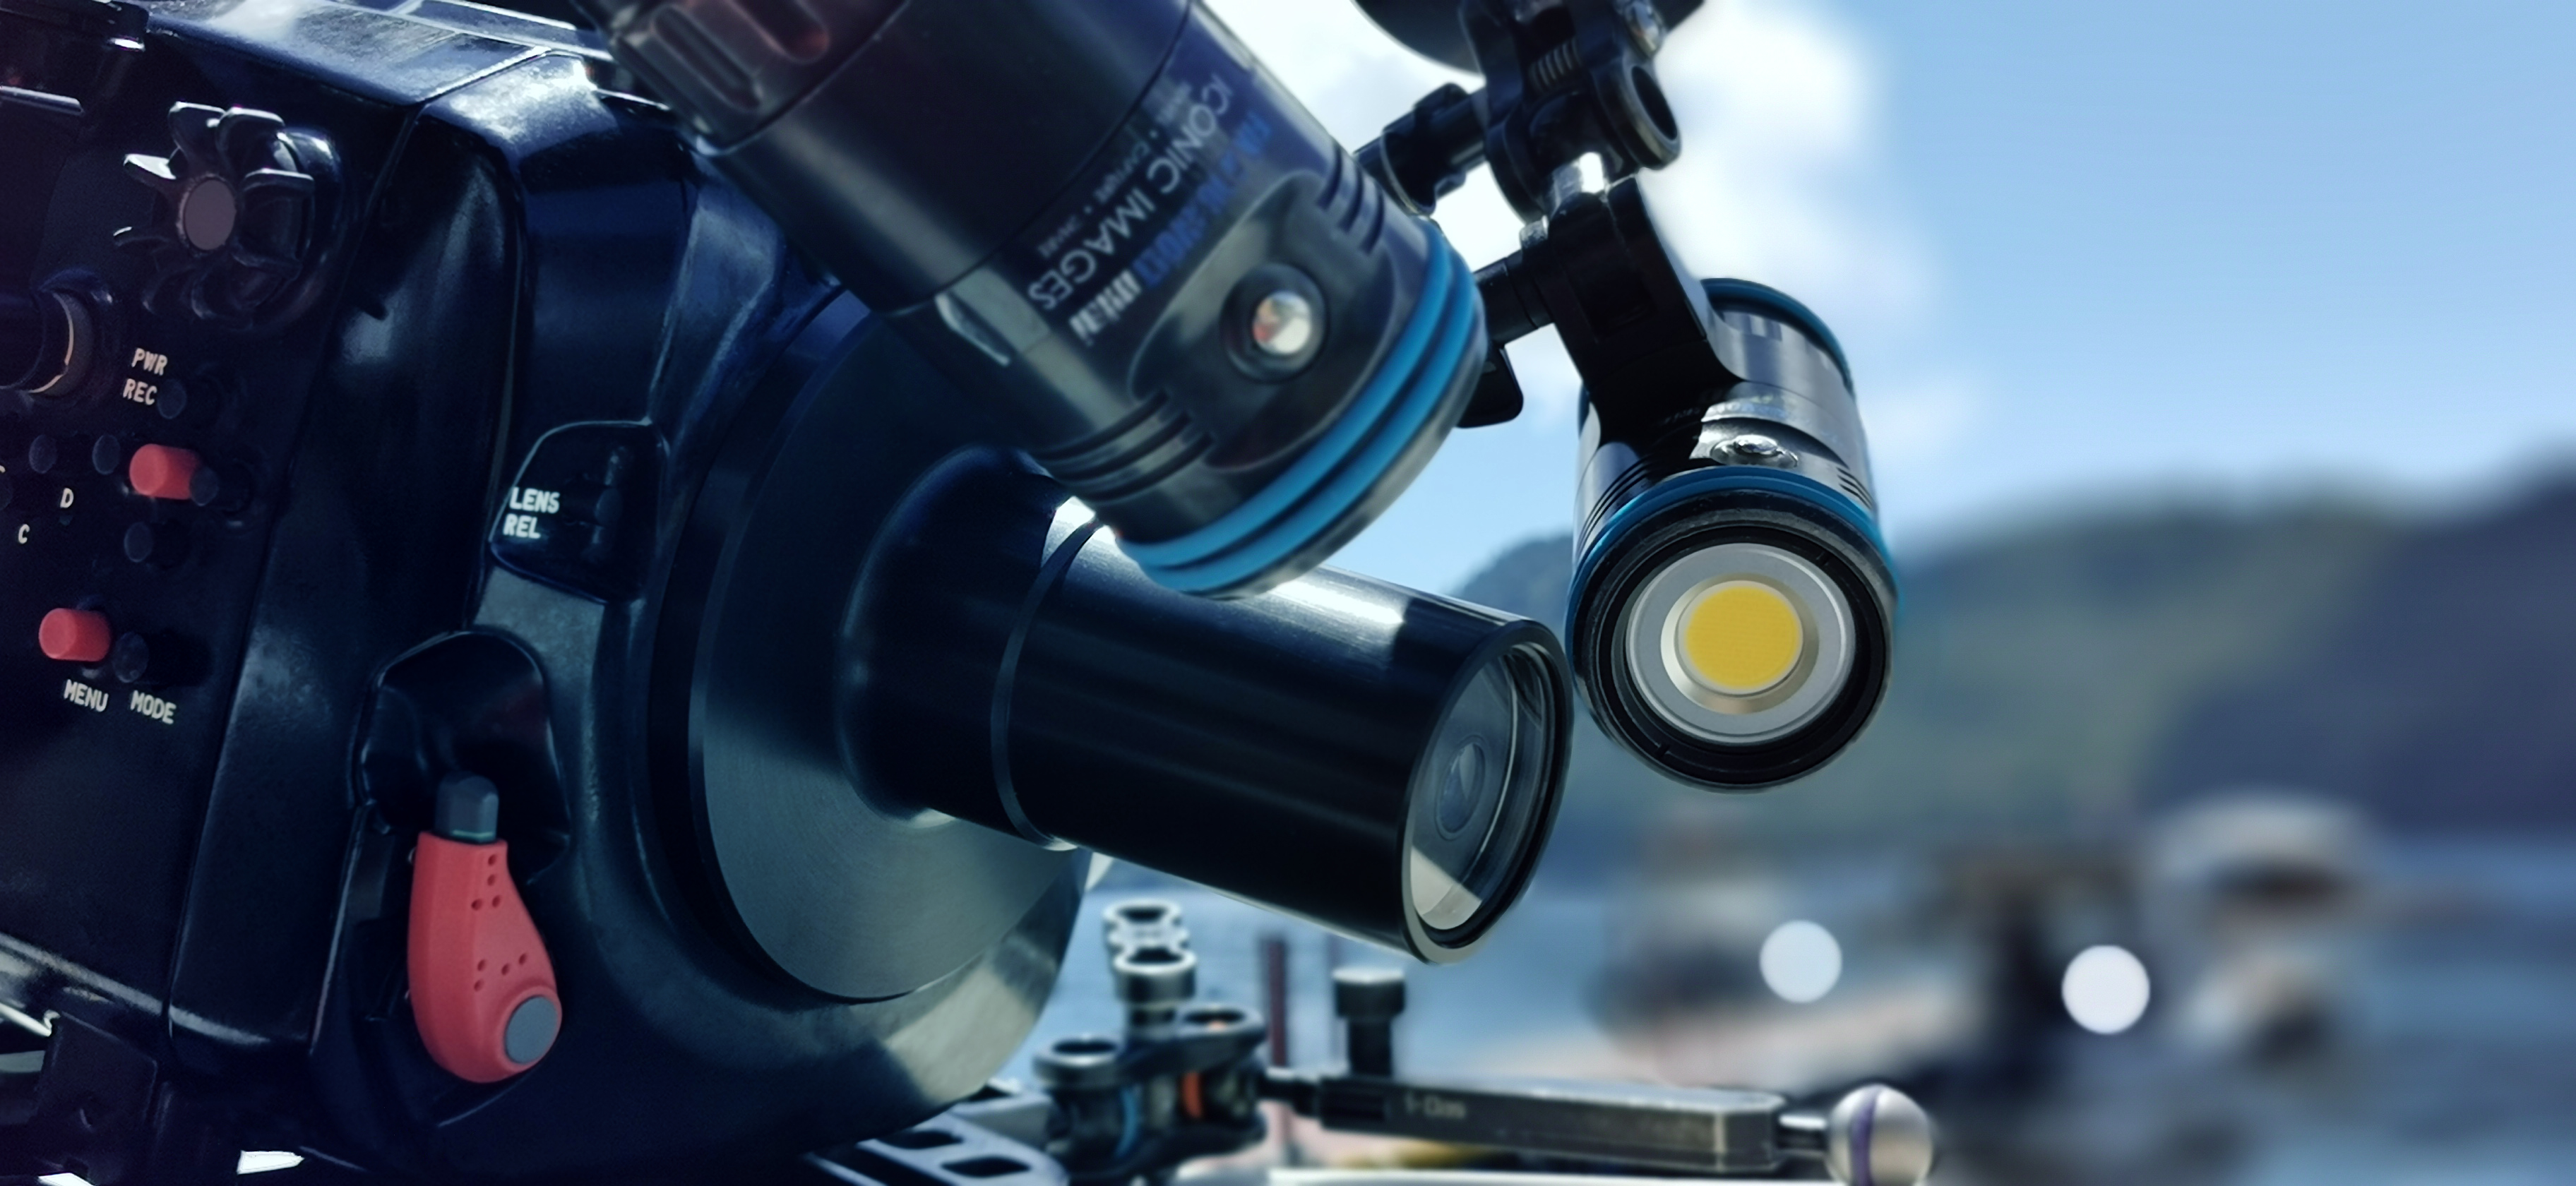
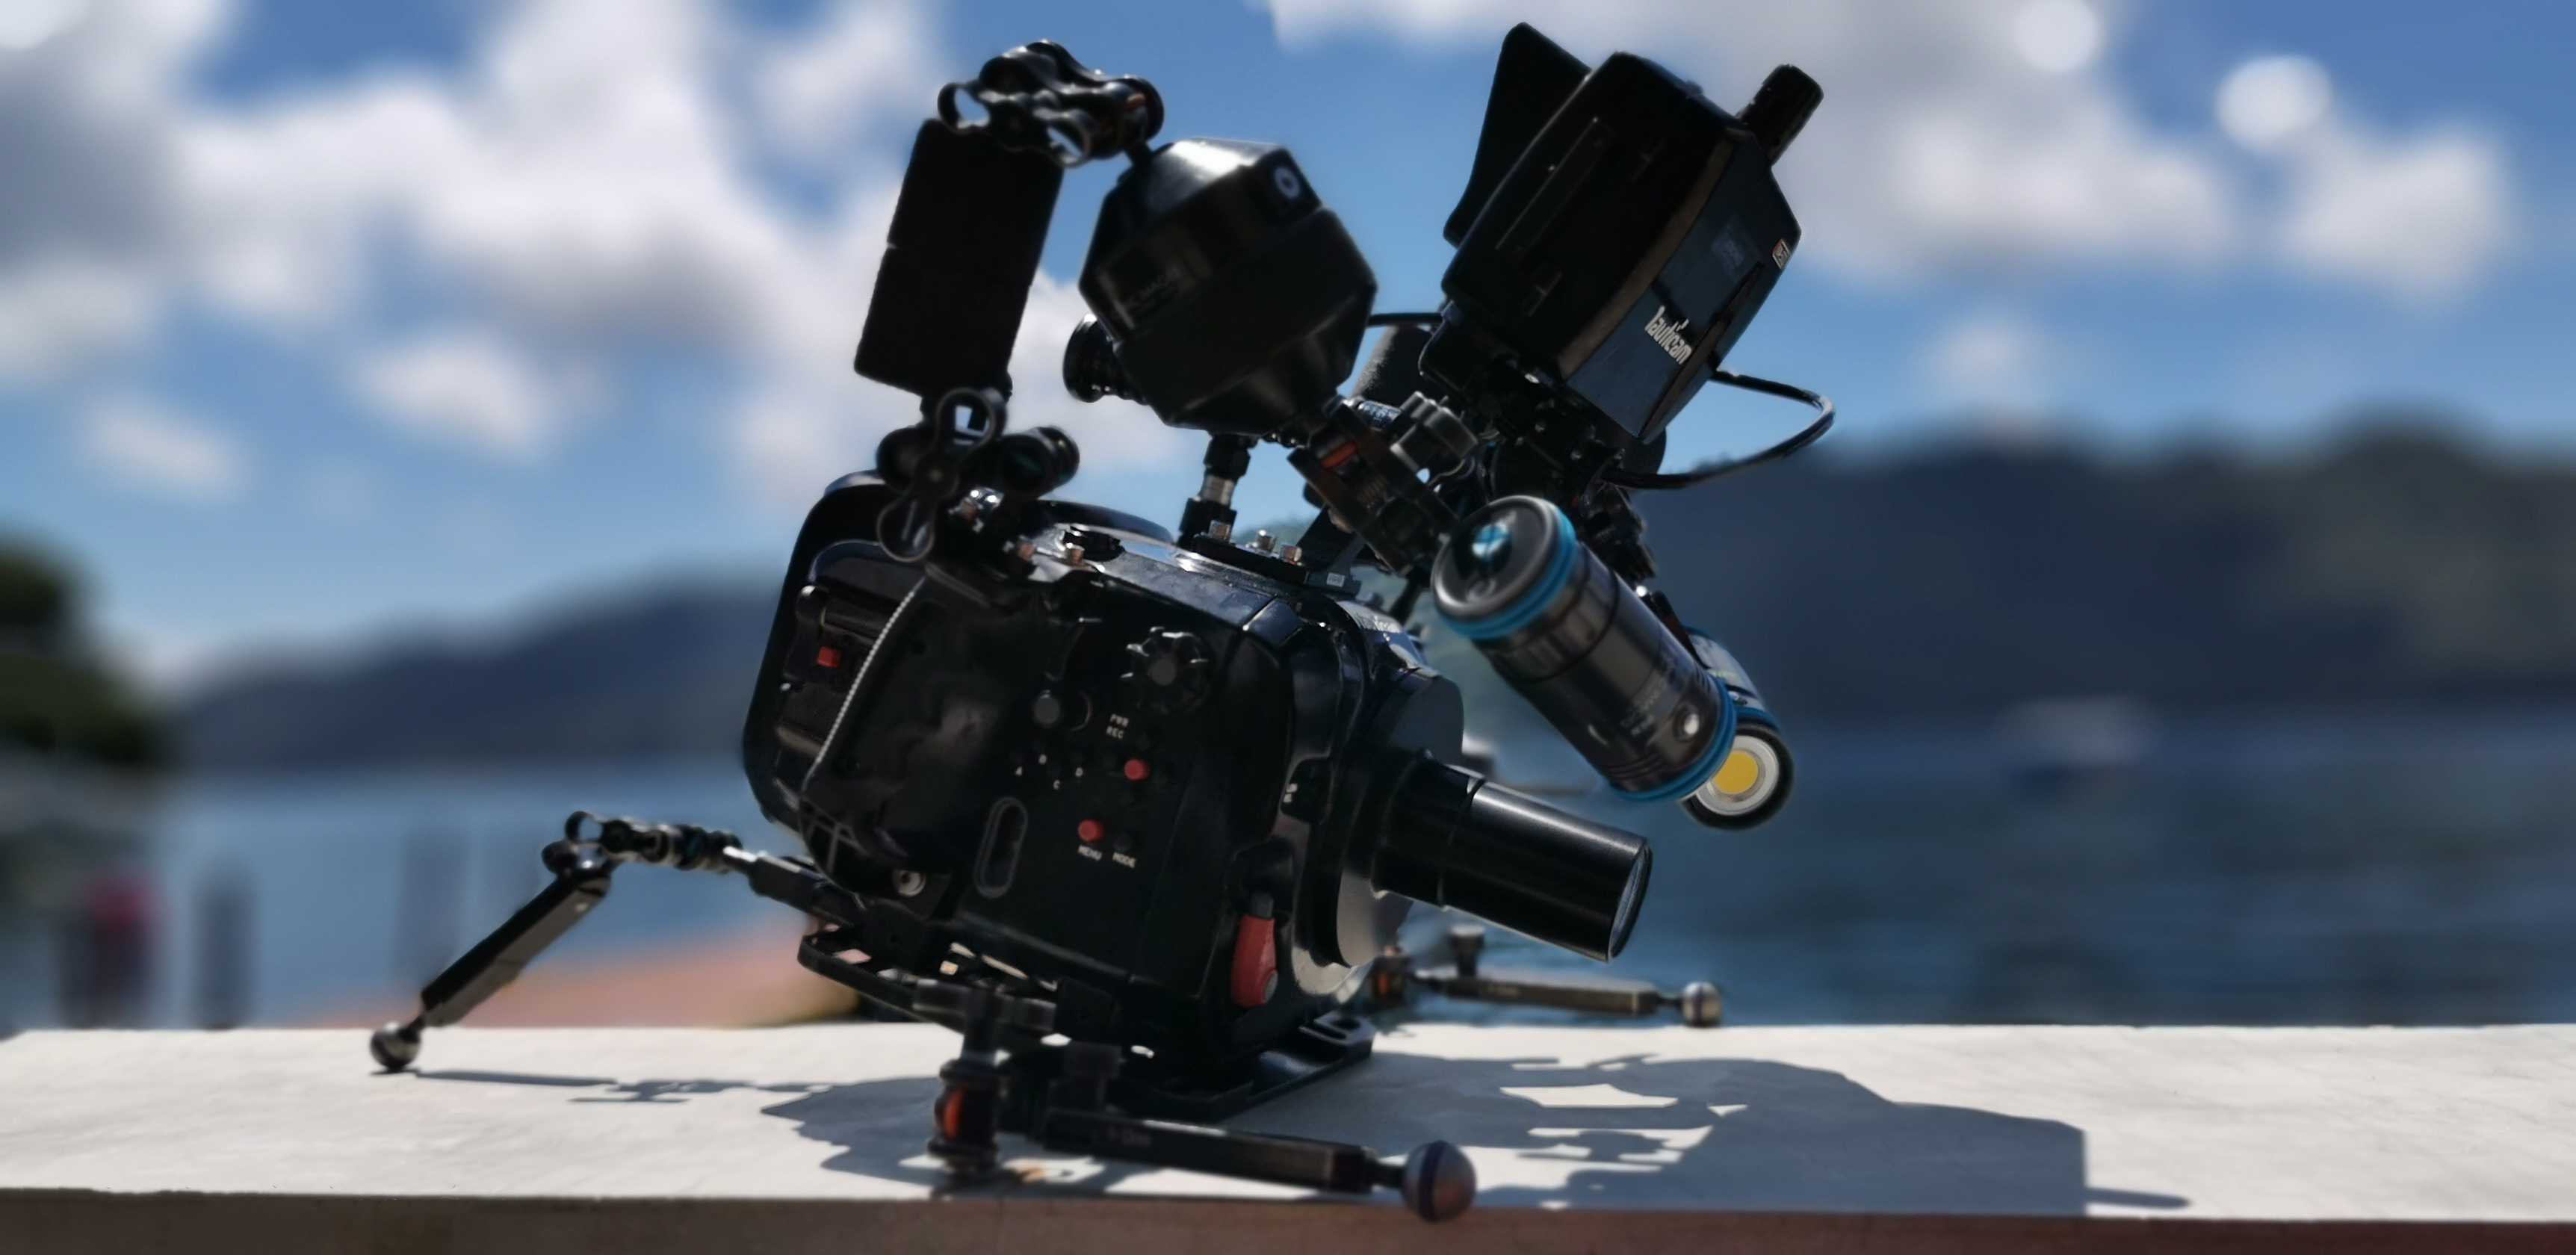
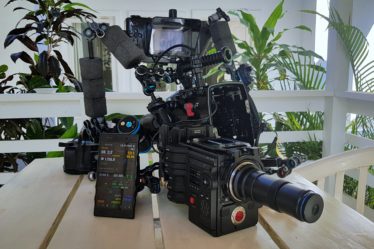
After a test fitting, a port cap was cut from leftover aluminum material and the port was then anodized in black to match Nauticam housings. The completed port was truly beautiful to behold. It felt great and the narrow diameter promised much better handling than ports of standard width.

The finished item! The port cap is knurled for better grip and has an O-ring inlay for a snug fit. The lens sits almost right up to the glass and an indent was drilled to mark the port insertion point..
Pressure Tests
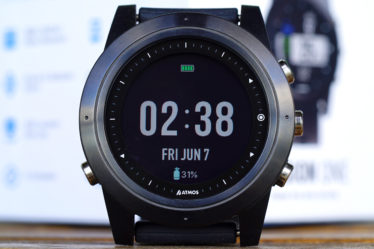
Before I could confidently use this port on a trip, I had to ensure that there was no chance it would leak during a dive. This meant conducting a pressure test to depths beyond what I would normally do for macro dives. To accomplish this, I took the finished port over to my friends at Quantum Maré (A dive shop in Kuala Lumpur, Malaysia) to depth test the port in their pressure chamber.
An Atmos Mission One dive computer was placed together with the sealed port into the pressure chamber. The pressure was slowly increased manually to a 40m simulated depth reading.
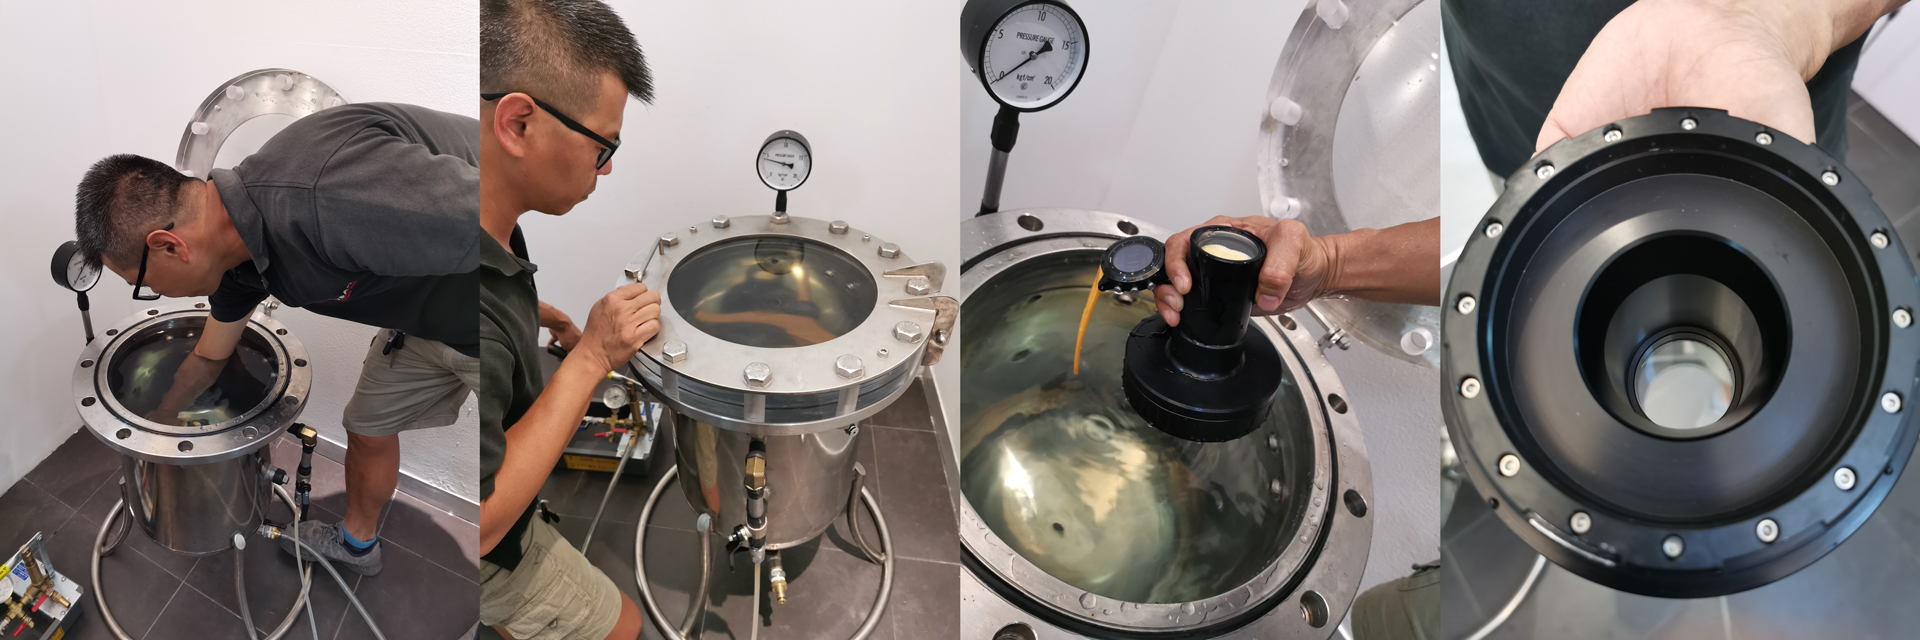
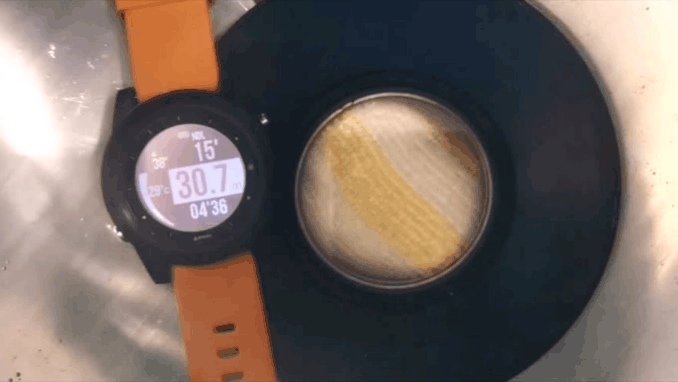
The port was then left under that pressure for a while and later removed from the chamber. It was bone dry and ready for dive use!
Using the Custom Laowa Port
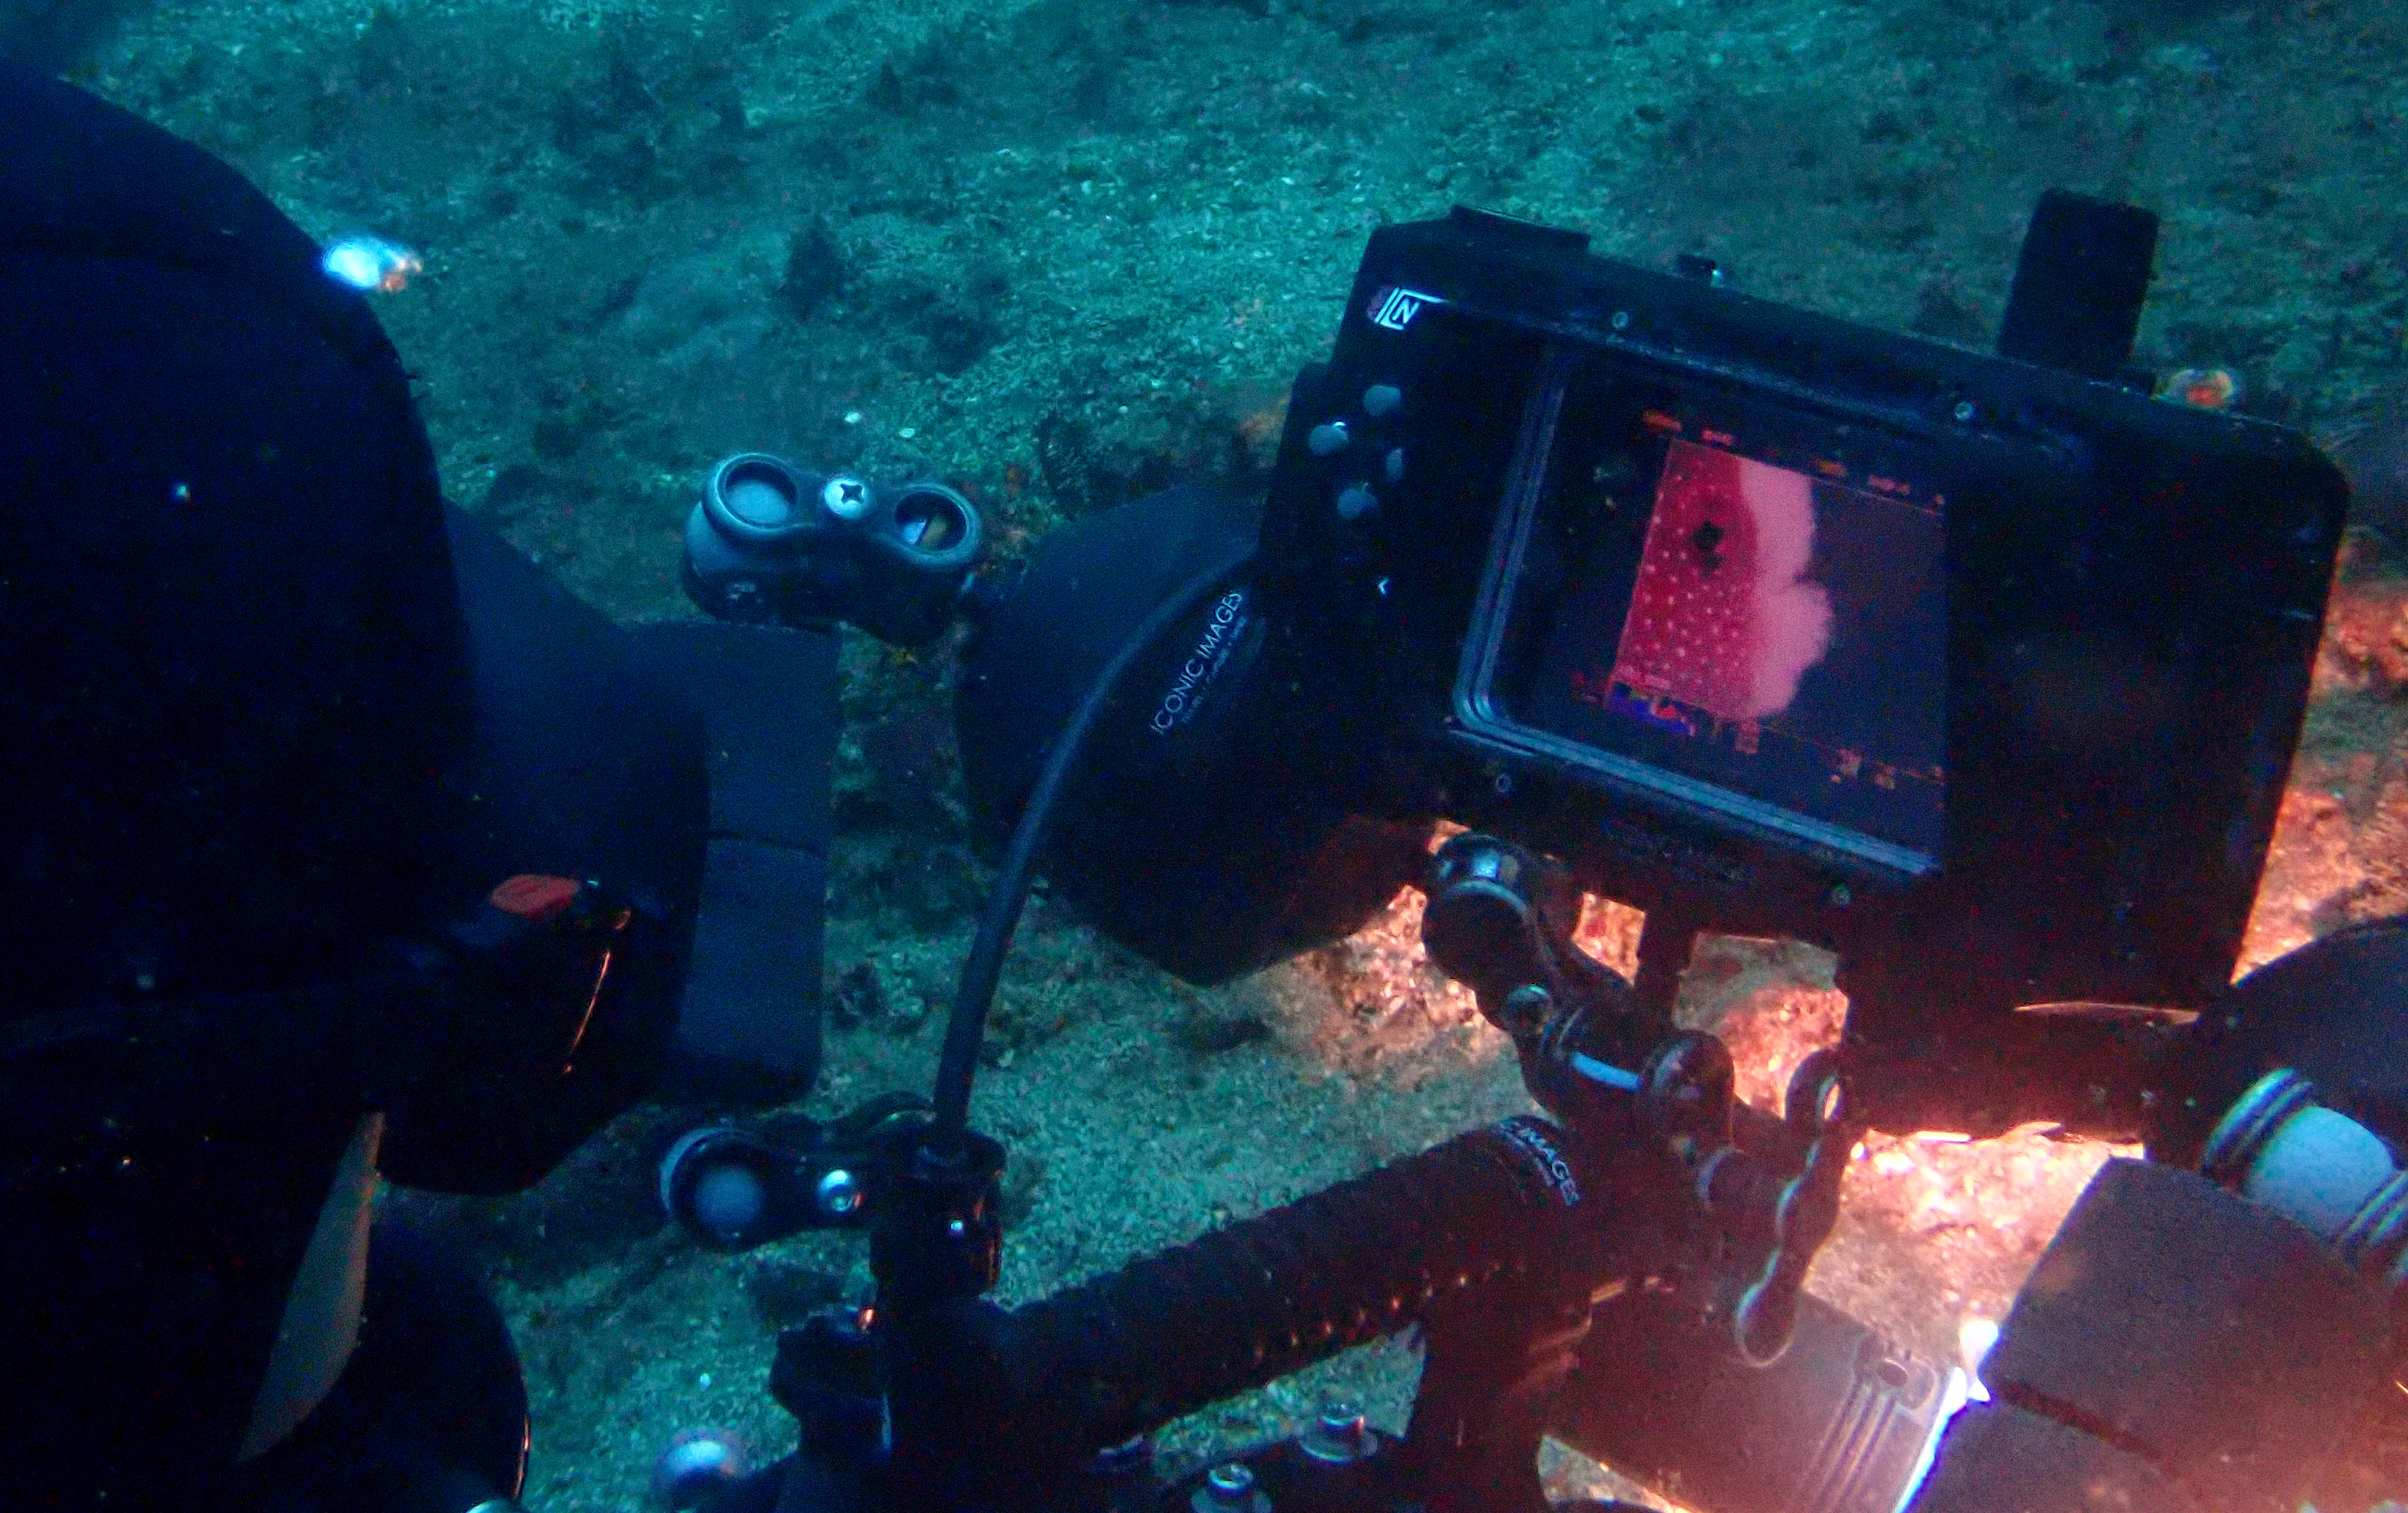
Immediately after receiving the port, I headed to my favourite macro dive location, YOS Dive Lembeh, to test shoot it.
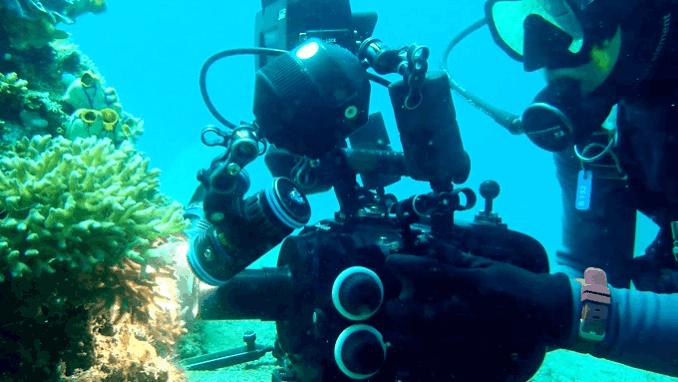
One advantage of using such a narrow port for videography work stood out immediately. I could actually look past and over my port to see the subject area itself. When I used the Laowa lens in a standard sized port, the port was so wide, it obscured my line of sight to what I was pointing at.
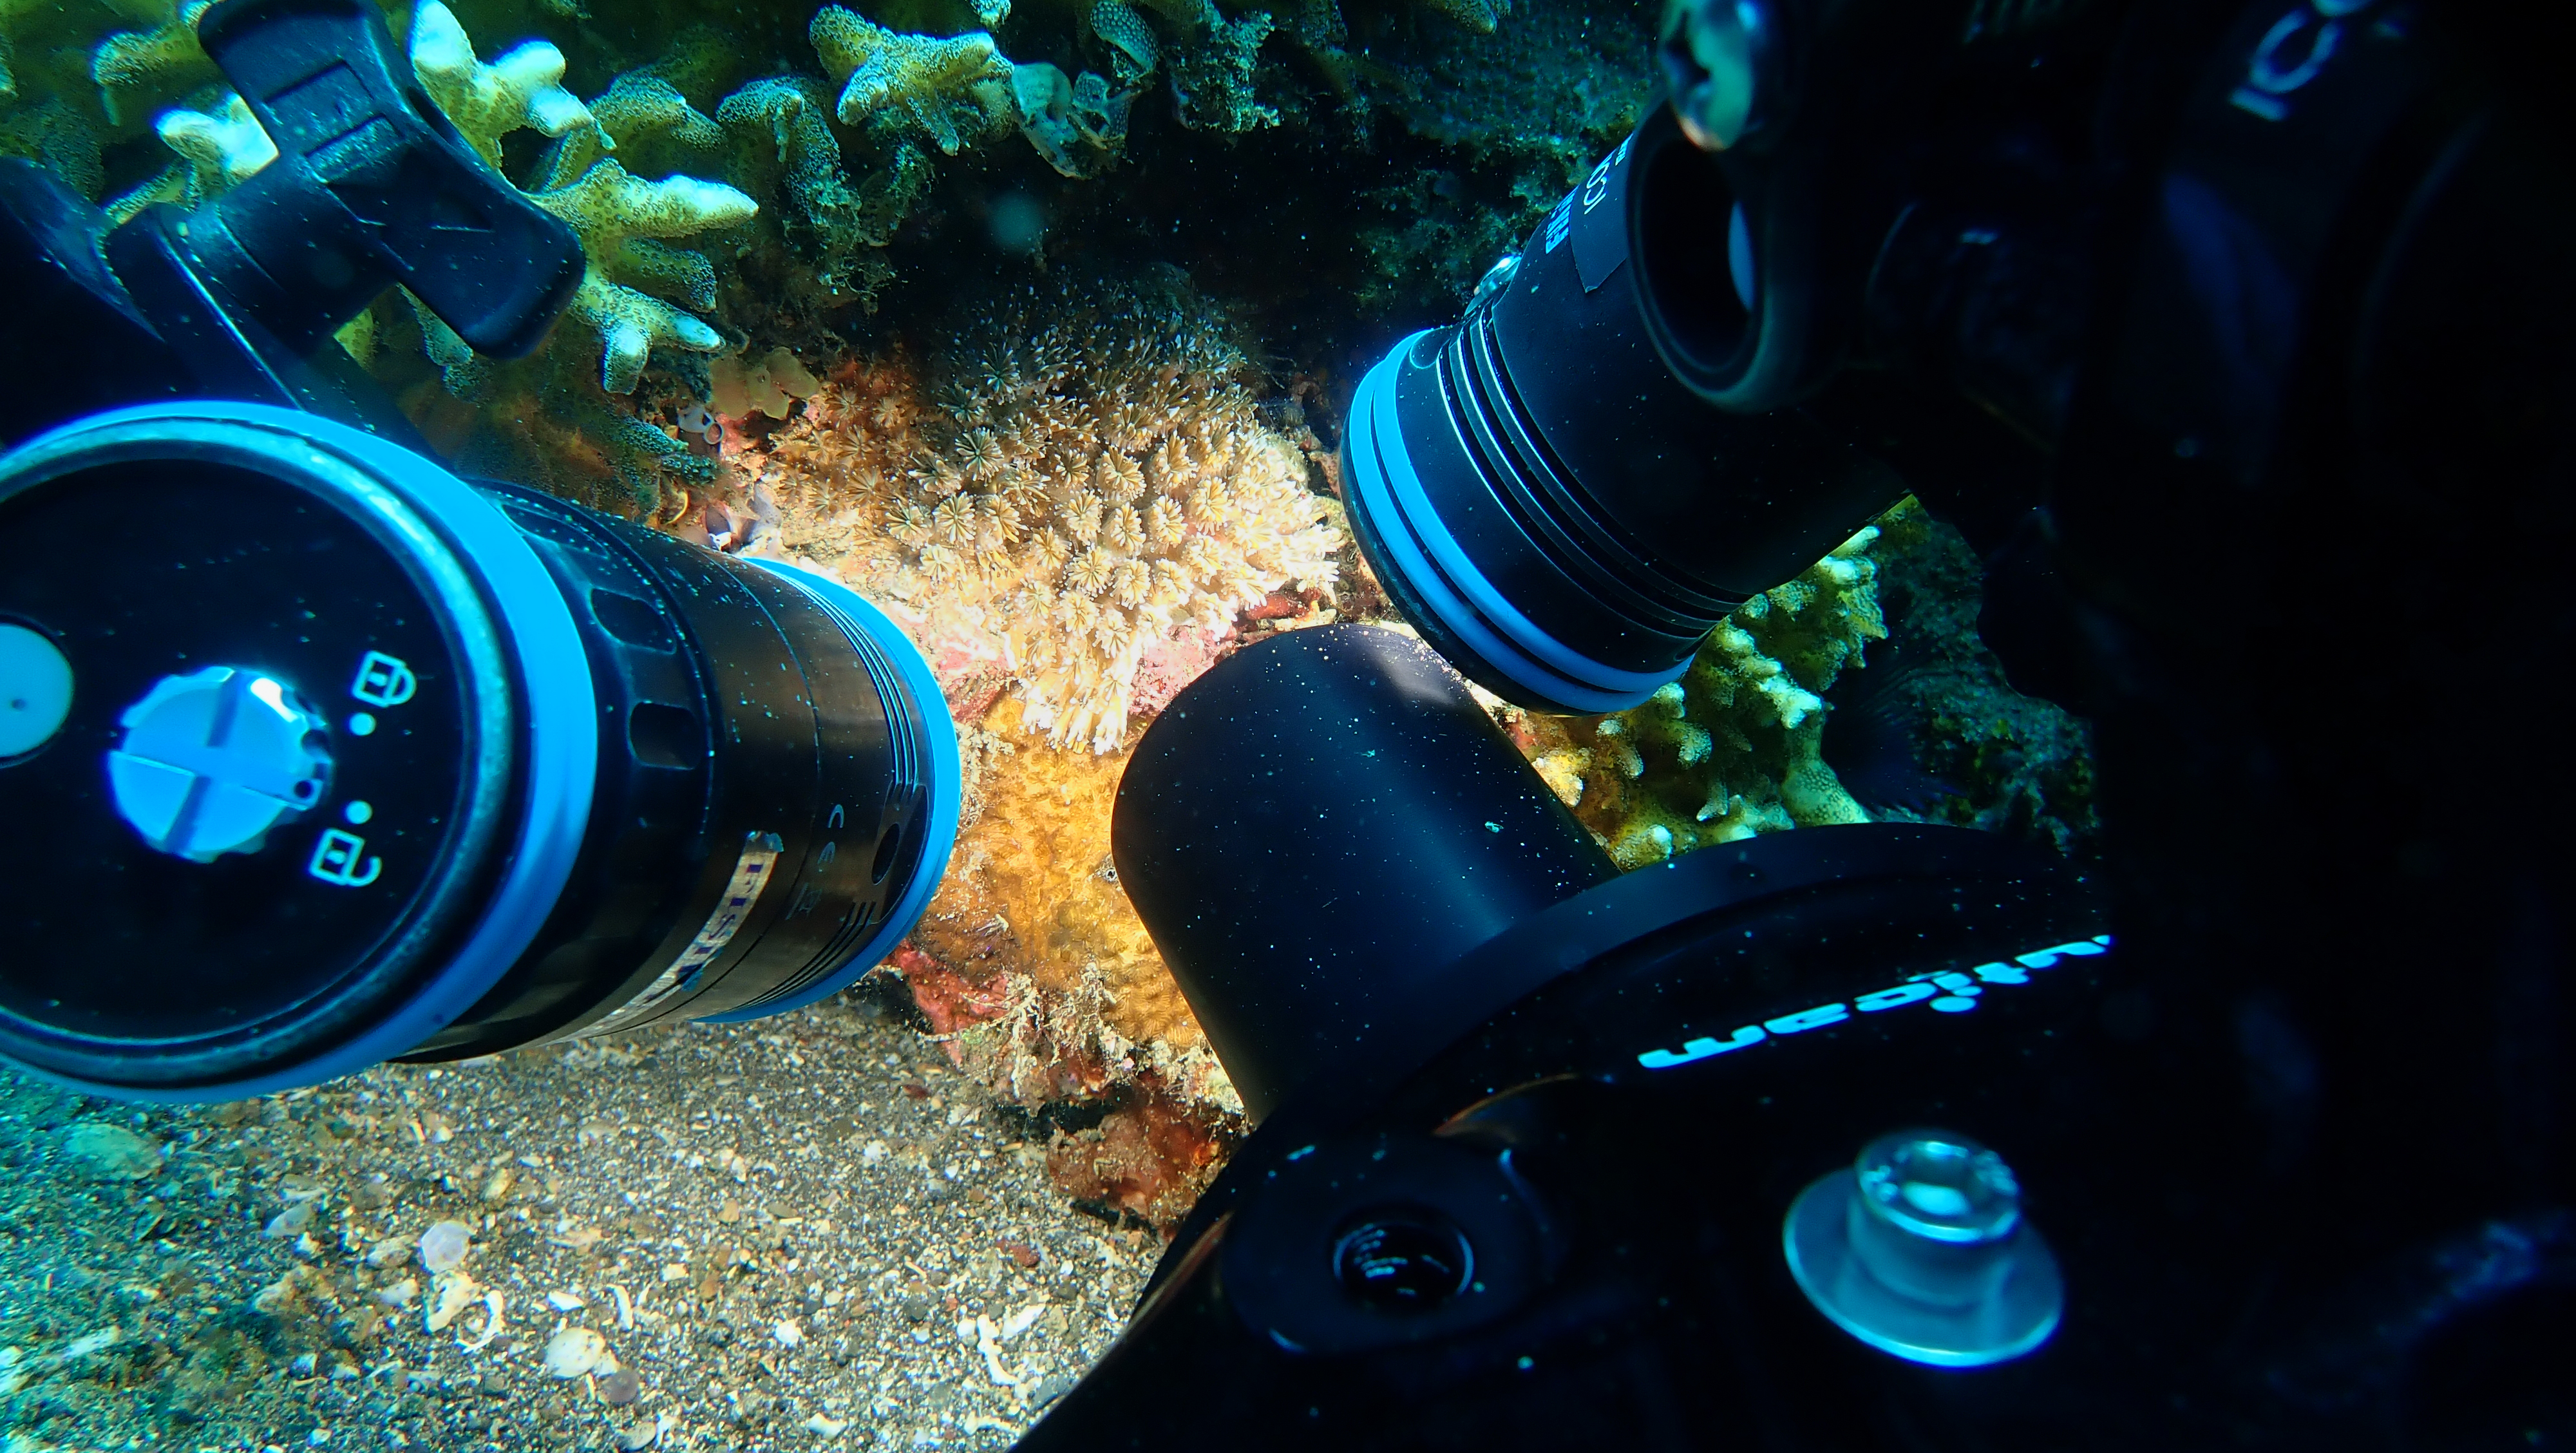
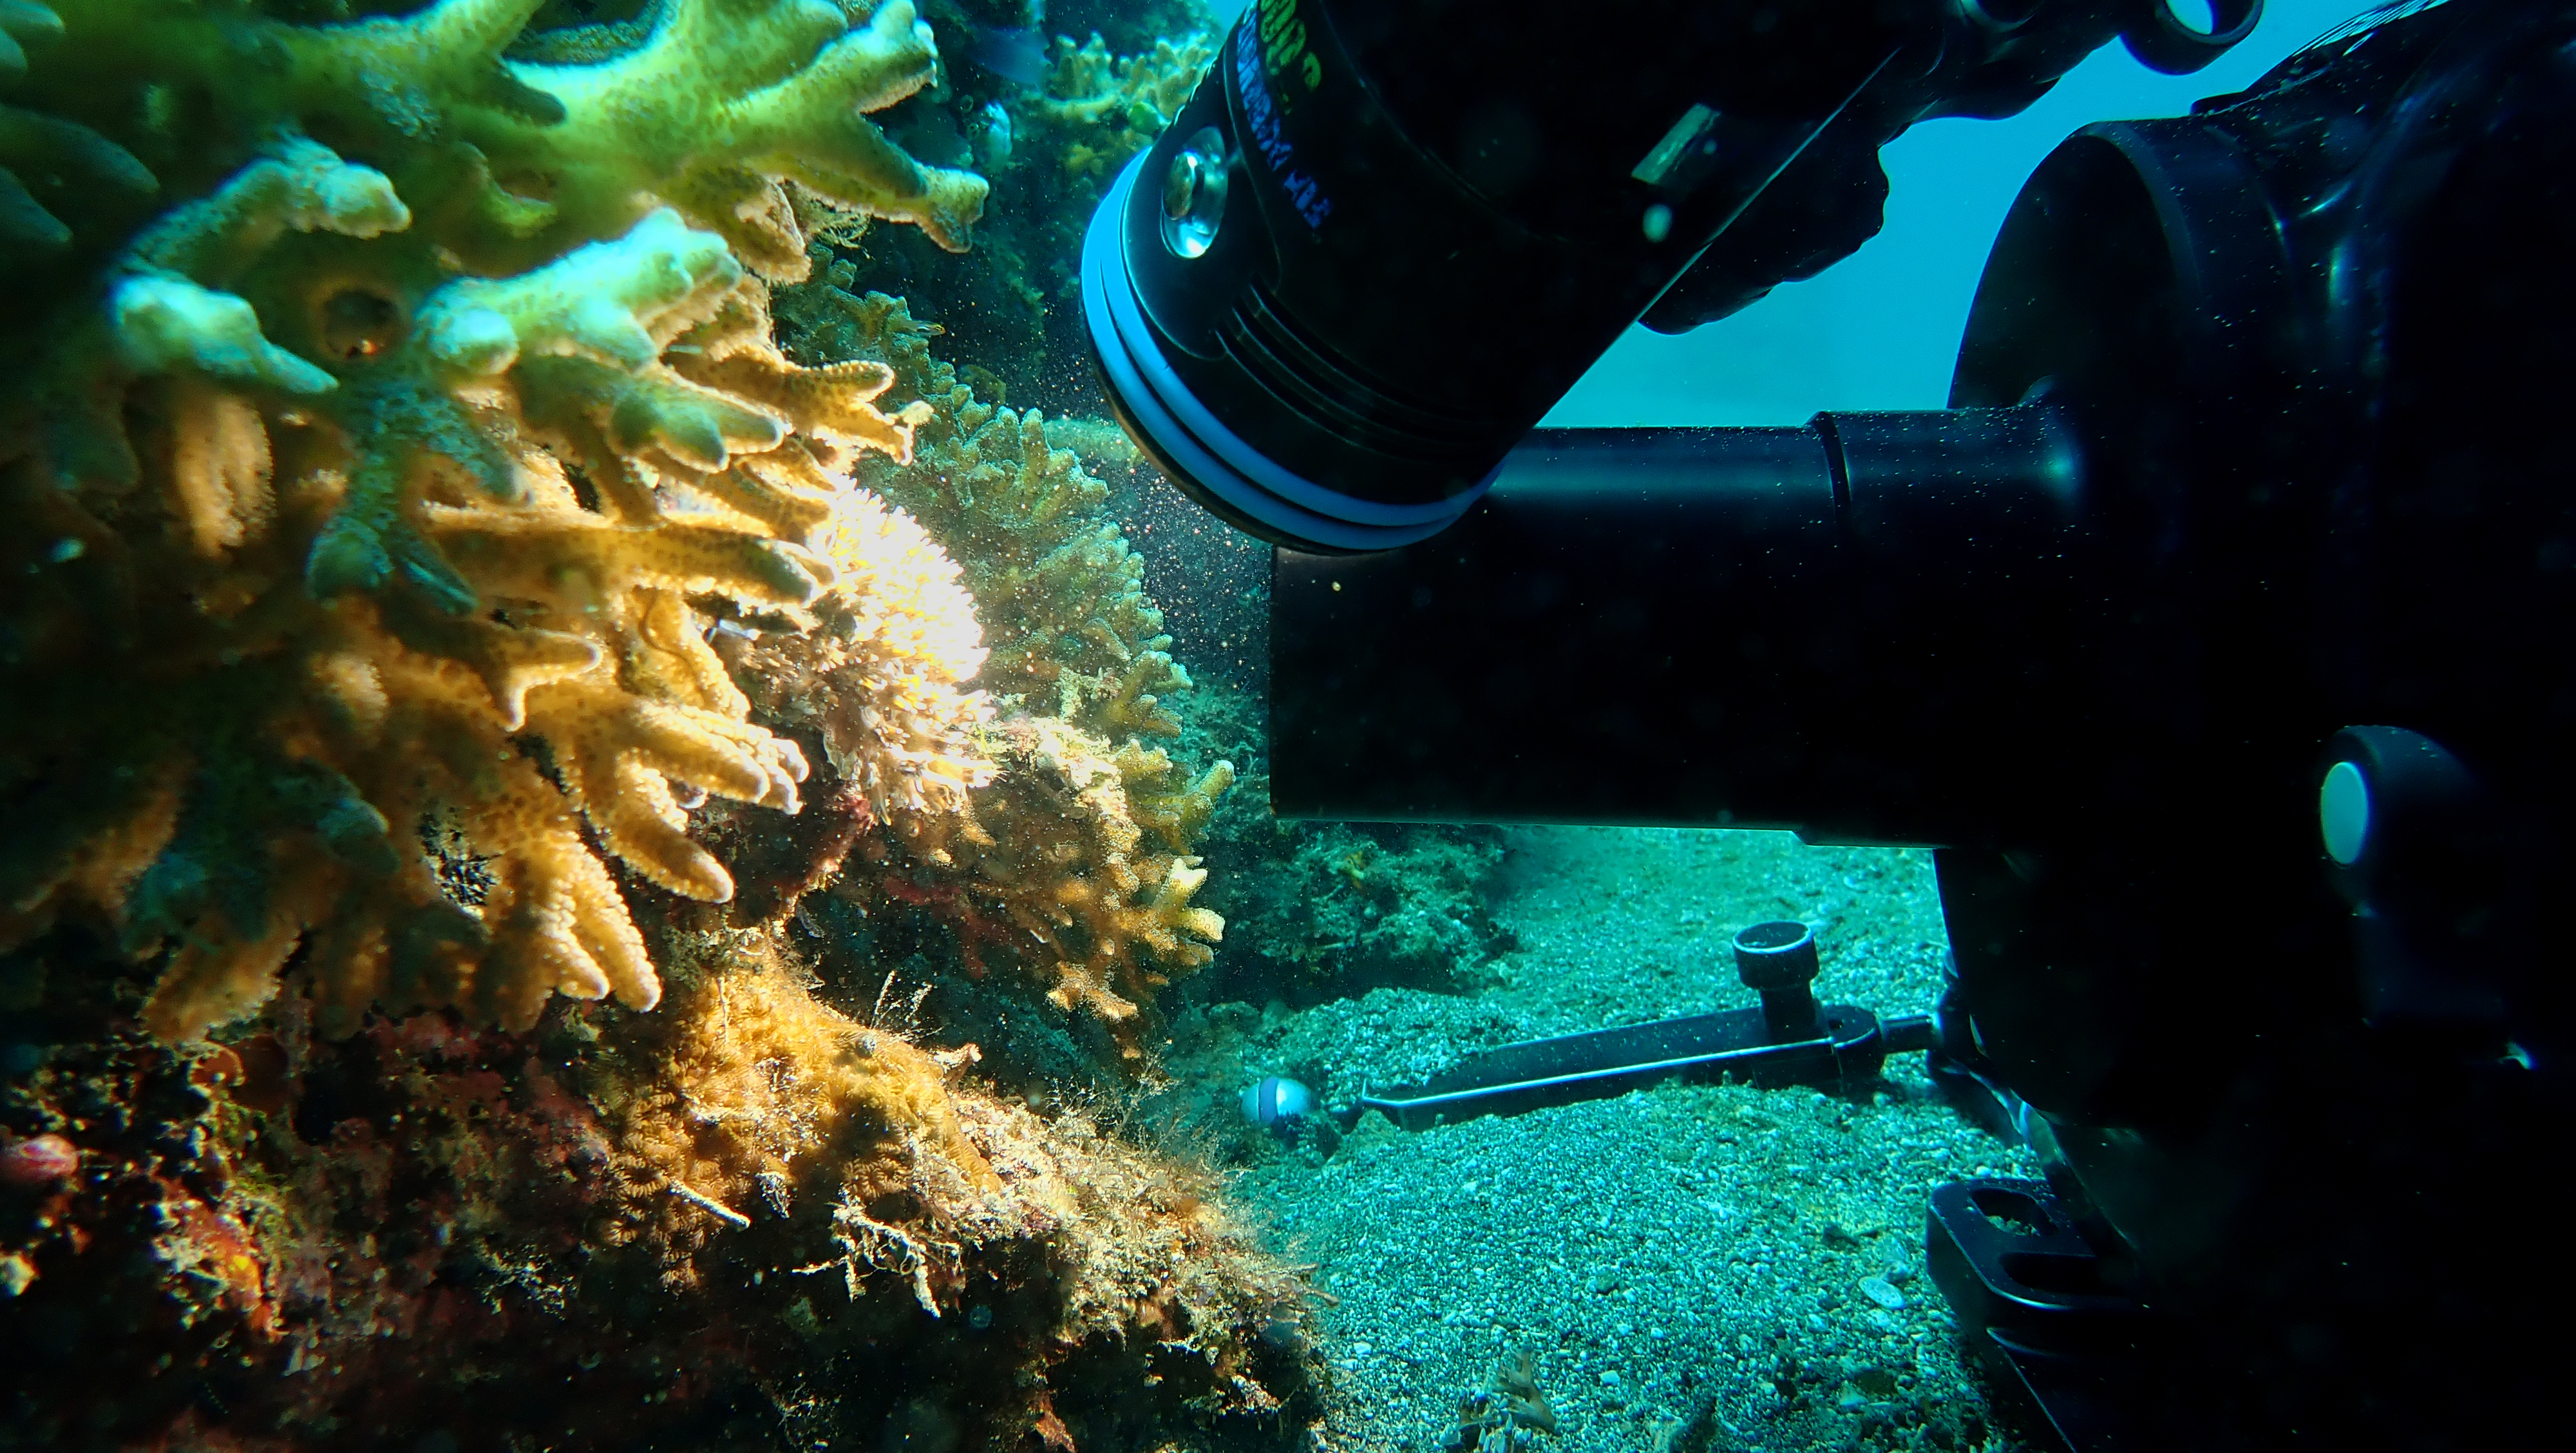
As expected, the narrower port also made lighting the subject far easier. The Laowa ultra macro lens gives users a fantastic amount of working distance as opposed to using to high magnification diopters. The images above were taken with the lens in focus to demonstrate just how much space we get.
Even more impressive is the fact that it gives this working distance while delivering magnification levels higher than any wet diopters currently available. When used in conjunction with the custom port, lighting the subject was far less cumbersome than working with a wider regular sized port. You can see this from the following video of me at work shot by my dive guide, Hiros Temporne.
In the article I wrote about the Laowa ultra macro lens, I explained that the lens does not focus internally. Because of this, when used underwater, the Laowa is set at its highest magnification when placed in the port and housing. Focusing is achieved by physically moving the housing itself. At magnification levels this high, all it takes to adjust focus is slight pressure on the handles.
For photographers using this port, the advantage would be the ability to hold the tip of the port to maintain better control for subject acquisition and focusing (via movement). Subject acquisition will be much quicker given the smaller diameter of the front element. Anyone who has experience with a high powered diopter will tell you how frustrating it can be looking through a viewfinder and searching for your subject. This much narrower port will get photographers closer to the intended target much quicker.
Final thoughts
I couldn’t have asked for a better port for the Laowa lens. The custom port turned out perfect and was exactly what I needed to take advantage of the unique size and construction of the 25mm ultra macro. I hope to be able to get optical glass for the port soon as I fear scratching the acrylic element. Sam was also thoughtful enough to provide me with a spare acrylic front element and o-ring in case I scratched the one installed on the port! Thanks buddy!
I can’t wait to use this lens again during my next trip to Lembeh in September! In the meantime, here are a couple of short clips I shot using this lens.
If you are interested in purchasing the Laowa 25mm Ultra Macro lens, you can do so here.
If you would like to have this port made, do leave a comment and let us know. I will forward it on to Sam 😉
Hi there
Amazing work. Do you have port for laowa macro lens for Sea&Sea?
thanks
Tom
Thank you for having a look at the review. I can’t personally offer this port as it was a custom build. However its certainly possible to be created for a sea & sea mount. If you are serious about getting one, I could ask for you